Showing posts with label entree. Show all posts

Friday, July 27, 2012

Recipe: Roasted Vegetables and Goat Cheese Pasta


An eggplant. Missing ingredients. A car accident. The inability to read and follow simple directions.

What do all of these things have in common? You guessed it. My first foray into cooking in quite some time didn't go exactly as planned. The food was still delicious (which is of course the main point) but it took quite a bit longer and was much more frustrating than it should have been. Oh well.

I am, as I may have mentioned, house sitting. And I haven't entirely figured out their kitchen organizational system as of yet, which meant I was already a tad frustrated when I began because, really, how hard should it be to find a mixing bowl? Naturally it was in the last drawer that I looked in. Figures.

The first step in this vegetarian pasta is to roast your veggies. This was my first time ever cooking an eggplant, and I was pretty excited. Mostly because we ate a lot of eggplant in China and it was amazing. Amazing. Anyways, the selection of eggplants at Safeway was less than inspiring, but I managed. Cut it up into small chunks, along with some yellow pepper and onion. Toss the lot with olive oil and finely chopped garlic (the more the merrier, I always say) and spread in a shallow baking dish or on a cookie sheet and throw in the oven for approximately 30-45 minutes (depending on how big you chopped your veggies).

'


This phase of the operation went flawlessly and I was beginning to feel better about this whole cooking thing. [insert ominous music here] Then I went to pull out the ingredients for the pasta sauce so I could get going on that ... and I discovered that, sadly, in spite of multiple reminder notes to myself, I had forgotten to pick up the bottle of white wine from home, even though I had already been there twice that day. And since the sauce is basically pureed tomatoes, wine and goat cheese, the wine is a pretty crucial ingredient. I couldn't exactly skip it. But I didn't really want to go and get it and leave my veggies in the oven roasting all on their lonesome.

Well, I thought to myself, no problem. I'll just call my parents and invite them over for dinner too as long as they bring the wine. That way I can keep cooking and they get a free dinner out of it. Win-win, right? The only problem: they weren't home. And neither of them answer their cell phones (naturally). So what choice did I have? I could have dashed to the local liquor store and bought a whole new bottle, but I'm cheap and didn't want to do that. So I waited until my veggies were done, turned the stove off and dashed off to the parentals house.

Or at least I tried to. I got about 2 blocks from my housesitting place and then there was a giant accident blocking off the intersection and pretty much my only way out. And by giant I mean not giant, but it was still big enough to block Quadra for a good long ways. Super annoying. I had to take a ridiculously long detour to get to my parents house, grab the wine, and then get stuck in the traffic on the way back which was still held up from the accident. Good times.

Anyways, got back to my new place, started making the sauce. Put the pureed tomatoes and wine in the pan along with some oregano. Forgot that I was halving the recipe and put in too much wine. Oops.


Still tasted fine though. I just let it boil for a little while longer to get rid of some of the alcohol taste. While that was cooking I got the pasta started. I used my favourite (fusilli) but you of course could use whatever type of pasta you feel like.

After the sauce has been simmering for about 15 minutes, add in the roasted vegetables and simmer for another 10. By that time your pasta should be about done. Drain it and pour the sauce over top. Crumble the goat cheese on top with some fresh basil and mix thoroughly. The goat cheese will melt and give a delicious creaminess to the sauce. Yum.

Serve immediately. :)


Oh, and one last thing that went wrong with this meal -- I took all the photos for this blog post, but then realized I had left my camera cord in my other bag, which was still at my parents' house. So this post had to wait a couple of days for me to go back and get it. Sigh.

Here's the full recipe (which is, naturally, from The Girl Can't Cook)

Roasted Vegetables and Goat Cheese Pasta

Ingredients:
1 large eggplant, peeled, salted, and rinsed
1 large yellow bell pepper
1 large white onion
1 head garlic, cloves peeled
1/3 cup extra virgin olive oil
1 can (796 mL) Roma tomatoes, pureed
1 cup white wine
1 tsp dried oregano
1 lb. short pasta (penne, etc)
1 cup soft goat cheese, crumbled
1/2 cup slivered fresh basil
salt and freshly ground black pepper

Directions:
1.  Preheat the oven to 400 F. Slice the eggplant and cut into 1-inch chunks. Cut the bell pepper into cubes and cut the onion into chunks. In a shallow roasting pan, combine the eggplant, pepper and onion with the garlic cloves. Drizzle with the olive oil and toss to coat. Rost in the oven for 45 minutes, until tender, stirring once or twice.

2.  Meanwhile, in a large pot, combine the pureed tomatoes, wine and oregano and bring to a boil over medium-high heat. Reduce the heat to medium-low. Simmer, uncovered, for 15 minutes to thicken. Stir in the roasted vegetables and simmer together for 10 minutes longer.

3. Cook the pasta in a large pot of boiling salted water until tender, about 10 minutes. Drain well but don't rinse. Stir the cooked pasta into the sauce and heat through. Add the crumbled cheese and basil, and season to taste with salt and pepper. Serve immediately or turn into a casserole dish and bake at 375 F for 10-15 minutes, until the cheese begins to brown.


Saturday, June 16, 2012

Recipe: Double-Dipped Chicken Fingers + Spinach Salad with Orange Goat Cheese Dressing


Yum. This was a delicious meal, and I can definitively say that this recipe is extremely flexible. Because for a  wide variety of reasons, I basically didn't follow the recipe at all. Oops. Oh well. It was still delicious. Yum.

First step is to make the dressing. The original recipe called for blue cheese and  lemon juice in the dressing, but that was obviously not going to happen. Blue cheese? Gross. So what did I substitute? Goat cheese, obviously. What else would I do? And I had every intention of using lemon juice. I really did. Except I didn't check the fridge before I went to the store. We only had like a tablespoon of lemon juice left in the bottle. And the only lemons in the fridge were growing some kind of funky fuzzy stuff. Ew. So instead, I used oranges. Totally the same thing, right? Oh, and last change to the dressing? I opted out of the chopped celery and threw in some dried cilantro. 

So to recap the ingredients: sour cream + goat cheese + hot sauce + freshly squeezed orange juice + orange zest + cilantro + salt and pepper. Whisk them all together, and you've got some fairly serious magic.


Toss about half of the dressing together with some spinach, finely chopped red onion, and mushrooms (optional). Set aside the rest of the dressing to be used as dip for the chicken fingers.

Meanwhile, heat up some oil in a deep pot and get your flour and buttermilk ready. Coat the chicken fillets once in flour and buttermilk, then twice, and then one last time in the flour before firing them into the oil. 


Cook to your preferred level of crispiness, remembering to turn them over about halfway through.


Once they're all crisped up, put them a plate lined with paper towel and sprinkle with salt. Throw the next batch in the oil, and keep going until they're all cooked.


Serve them beside the spinach salad with extra dressing for dipping sauce, or chop them up and sprinkle on top of the salad. Your choice. I added chopped peaches to my salad for garnish and a bit of a flavour pop (berries would work nice too -- blueberries in particular, I think) as well.


Enjoy :)

The original recipe comes from Rachel Ray's Express Lane Meals.

Double-Dipped Buttermilk Chicken Fingers on Spinach Salad with Blue Cheese Dressing
(aka possibly the longest recipe name of all time)

Ingredients:
Zest and juice of 2 lemons
A few dashes of hot sauce
1 cup blue cheese crumbles
1/2 cup sour scream
1 celery rib, finely chopped
Salt and black pepper
Vegetable oil, for frying
3 cups all-purpose flour
2 cups buttermilk
1 teaspoon paprika, 1/3 palmful
1 1/2 to 2 pounds chicken tenders
1 pound spinach
1/2 small red onion, thinly sliced
10 button mushrooms, stemmed and thinly sliced

Directions:
1. In a small mixing bowl, combine the lemon juice, hot sauce, crumbled blue cheese, sour cream, celery, salt and pepper. Mix the dressing well and reserve.

2. Preheat 1 1/2 inches of vegetable oil in a large deep skillet. While the oil is heating, set up a breading assembly line near the stove. Put the flour in a large, wide bowl; pour the buttermilk into a second large, wide bowl; then stir in the lemon zest and paprika. Season the chicken tenders with salt and pepper. Working in 2 or 3 batches, dust the chicken tenders in the flour, shake off the excess, then coat in the buttermilk. Transfer them back to the flour and coat them thoroughly, then back to the buttermilk, and then back into the flour for one last coating.

3. To test the oil temperature, add a 1-inch cube of bread to the hot oil. If it turns deep golden brown by a count of 40, the oil is ready. If the bread cube browns too quickly, turn down the heat and wait a few minutes for it to cool down. Carefully place the first batch of coated tenders in the hot oil. Fry the tenders in small batches for 6 to 7 minutes, turning when the first side has become golden brown. Once cooked, remove from the oil to a paper-towel-lined plate and immediately sprinkle them with a little salt. Repeat until all the tenders are fried.

4. After the last batch of tenders goes into the oil, combine the spinach, red onion, and sliced mushrooms in a large salad bowl. Pour half of the dressing over the salad and toss it to coat. Top the salad with the fried chicken tenders, whole or chopped, your choice, and serve the remaining dressing on the side for dipping. 


Monday, May 28, 2012

Recipe: Bee's Specialty Pasta


I like to think of this dish as the one that started it all. Okay, maybe that's being a bit dramatic. But it was this particular dish that started off my whole cooking streak. You see, there was this rather upsetting incident at work one day, and I arrived home feeling quite awful about it. Therefore, I decided that some cooking was in order to cheer me up. Maybe cooking doesn't work that way for the rest of you, but it virtually always improves my mood.

Anyways, this pasta dish is one I created quite awhile ago and make with decent frequency for two simple reasons: we almost always have the ingredients on hand and it's really, really delicious.

The first step is to fry up some onions in oil. Once they start to get soft, add the chicken and some minced garlic. Once the chicken has browned on all sides, it's time to season it up. I use a liberal amount of both chipotle chili powder and cayenne pepper, but I suppose it's up to you on the level of spiciness you want. Remember though that it will be diluted by all the sauce and cheese and noodles, so don't be afraid to add more than you think is necessary. Honestly, if my mom could see how much spice I put in this dish, she'd probably have been afraid to even try it, yet she still loves it.


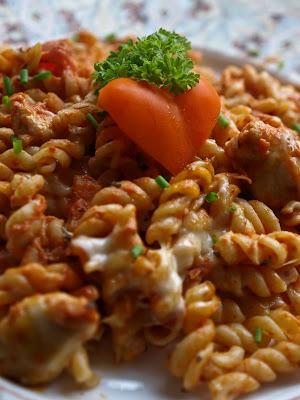
Next step: chop up some peppers (preferably orange or yellow) and throw them in the pan. Meanwhile, cook the noodles. Fusilli is my personal favourite choice for this particular recipe, but that's just me. If you plan on baking the pasta (an optional but excellent step), then preheat the oven now.


While the noodles are cooking, pour a jar of your favourite prepared tomato sauce over the chicken. Mix in about 1/2 cup of cream. Keep it on low heat until the noodles are done.


Pour the sauce over the cooked noodles, mix it all together and pour into a casserole dish. Top with lots and lots of grated cheese and throw in the oven.


When the cheese is bubbly and golden, serve up a huge portion and enjoy. :)


This recipe turns out a bit different every time I make it, since I made it up and I've never bothered to write down the exact proportions. But here it goes, such as it is:

Bee's Specialty Pasta
Ingredients;
2 chicken breasts
1 small onion, chopped
3-5 garlic cloves, minced
1 small orange or yellow bell pepper, chopped
Chipotle chili poweder, to taste
Cayenne pepper, to taste
1 jar of prepared tomato sauce
1/2 cup cream
Fusilli or other noodles
1 cup of grated cheese (cheddar, mozza, etc), optional

Directions;
1. Place the chopped onion in a skillet with some oil over medium-high heat. Meanwhile, slice the chicken breast into even chunks.

2. When the onions are just beginning to soften, add the chicken and the minced garlic to the pan. Brown the chicken on all sides.

3. Begin cooking the pasta and preheat the oven to 400 F if you intend to bake the pasta.

4. Add the chopped bell pepper to the frying pan and turn the heat down low. Pour the jar of tomato sauce over the chicken mixture. Add the cream and stir thoroughly. Keep on low heat, stirring occasionally, until the noodles are cooked.

5. If you're pressed for time, skip the baking step below and simply drain the noodles when they are done cooking and pour the sauce over top. Mix well and serve immediately.

6. If you do have the extra time, drain the noodles and place in an oven-safe casserole dish. Pour the sauce over top and mix thoroughly. Generously cover the top with shredded cheese and place the casserole dish in the oven (without the lid). Everything's already cooked, so all you're really waiting for is for the cheese to melt and get all bubbly. Should take about 10-15 minutes.

Enjoy :)


Saturday, May 26, 2012

Recipe: Fresh Pear and Curry Pasta


Bonjour! It's been awhile, but then I haven't been cooking much. Or at least not cooking anything new and different. And I didn't want to bore you with repeated recipes. Also, I've been trying to sort out my life the last couple of days, because I just got a new job! No, not a teaching job. But still, it's a pretty huge promotion. I'll even have my own assistant. Yay me!

Anyways, I got this absolutely 100% totally delicious recipe from my aunt, who made it for me a couple of weeks ago. I figured now was the perfect time to try it, because with just me and my dad in the house, I could feel free to make it as spicy as I liked.

Not only is the recipe really quite easy and super scrumptious, it is also vegetarian! Now normally I am all about the meat (and to be honest I was quite tempted to throw in some chicken or pork in this recipe, which you totally could if you're not into vegetarian), but I decided to stick with the original intention. Plus I knew from when I had it at my aunt's house that it was super filling, even without any meat.

But on to the actual cooking! First step is to saute up some onions. I used a red onion because that's what I had (plus it adds some more colour to the finished dish), but you could do whatever you like. Next, throw in the garlic and curry paste (I would recommend spicy over mild for this dish, but that's just me) and mix together for a couple of minutes. They should look something like this:


Next comes some tomato paste and honey. Once you add the honey, be prepared for it to start bubbling like mad. I totally didn't expect that, although I suppose I should have. Anyways, it was quite startling. After a few minutes, add some chicken broth and bring to a boil. Keep it boiling until you've reduced the liquid to less than 1 cup (depending on how saucy you like your pasta, you can reduce it less that this. It's up to you!). Since this will take about 15 minutes, now's a great time to start cooking your pasta.


When the sauce is reduced, throw in some thinly sliced pear wedges and cook for 1 minute. Then add in chopped Roma tomatoes and cream. At the last minute stir in some fresh chopped cilantro.


When the pasta is done, pour the sauce over the noodles and toss gently. Serve immediately!


Here's the full recipe:

Fresh Pear and Curry Pasta (Recipe from Joanne Christensen)

Ingredients;
1/2 small onion, chopped
2 Tbsp oil
2 garlic cloves, minced
1 Tbsp curry paste (Patak's in the best! And I would definitely recommend spicy, not mild)
1 tsp tomato paste
2 Tbsp honey
2 cups chicken broth
1 unpeeled ripe pear, sliced in thin wedges
2 Roma tomatoes, chpped
2 Tbsp cream
3 Tbsp chopped cilantro
Pasta for 2: rotini, bow ties, or shells

Directions;
1. In a frying pan over medium heat, saute onion in oil until soft.

2. Add garlic and curry paste and stir 2-3 minutes.

3. Add tomato paste and honey and stir another 2 minutes.

4. Add chicken broth, increase heat to medium high and boil gently, reducing liquid to less than 1 cup. Start cooking your pasta while sauce is reducing.

5. Add pear slices to sauce and cook for 1 minute.

6. Add tomatoes and cream and stir another 2 minutes.

7. Stir in chopped cilantro.

8. Pour sauce over pasta and toss gently.


Enjoy :)


Monday, May 7, 2012

Recipe: Spice Rubbed Chicken


This recipe was so beyond easy it was ridiculous. Like I'm pretty sure even the most incompetent cook in the world couldn't screw this up. The original recipe was for chicken thighs, which I think might have worked better simply because they tend to be more juicy than chicken breasts, but since that's all I had, that's what I made. Odd how that works, eh?

The chicken took all of 5 minutes to prepare, and then I just threw it in the oven for 20 minutes. Easy, easy, easy.

Here's the recipe:

Spice Rubbed Chicken:
Ingredients;
2 Tbsp brown sugar
2 tsp cumin (personally, I would put less cumin in - but that's just me)
1 tsp salt
1 tsp garlic powder
1 tsp ground ginger
1 tsp cinnamon
1 tsp cayenne  (I happen to love cayenne, so I definitely added more than 1 tsp. Adds a nice kick!)
1/4 tsp black pepper
10-12 chicken thighs

Directions;
1. Preheat the oven to 425 F and grease a baking sheet.

2. Combine all of the spices in a bowl and mix together so there's no lumps. Pat the mixture over the entire surface of the thighs.

3. Place the thighs on the baking sheet and place in the oven. Cook for about 30-35 minutes depending on the size/number of thighs.


That's it. That's literally all you have to do. It's beyond easy. And quite tasty to boot. :)


And yes. That is another salad with pecans and goat cheese. Sue me! :P

Monday, April 23, 2012

Recipe: Maple Roast Pork Tenderloin


It's time for another recipe, this time birthday style! Yesterday was my gramma's birthday, and I cooked jher a birthday meal for her and the rest of the family. This was only the second time I'd cooked this particular recipe, but it turned out fabulously and I'm glad I now have a chance to share it on the blog because, really, everyone should try this. It. Is. Delicious.


I didn't take any pictures of the process this time because well, you know, I was concentrating on making sure everything was ready on time. And not burning stuff.


So, without further ado, I will skip straight to the full recipe:


Maple Roast Pork Tenderloin with Apples
Ingredients:
½ cup maple syrup2 Tbsp Dijon or grainy mustard2 Tbsp chopped fresh rosemary (optional)2 Tbsp lemon juice2 Tbsp soy sauce2 ¾ lb pork tenderloins1 Tbsp canola oil1 Tbsp butter3 large Granny Smith, McIntosh or other tart apples, peeled, cored and sliced1 ½ cups apple cider or juice1 tsp cornstarch


Directions:
1. In a small bowl, whisk together the maple syrup, mustard, rosemary, lemon juice and soy sauce. Pour over the pork and marinate for at least 2 hours, or overnight. Preheat the oven to 450 degrees.


2. Heat the oil in a large skillet set over medium-high heat. Remove the pork from the marinade, reserving the marinade, and brown the tenderloins on all sides, turning as necessary. This should take about 5 minutes.


3.  Transfer the pork to a baking dish and bake for 20-25 minutes. Transfer the pork to a cutting board, cover it with foil, and let it stand until you’re ready for it.


4.  Meanwhile, add the butter to the skillet (don’t wash it out!) and sauté the apples for 5-7 minutes, until the apples are tender and golden. Transfer the apples to a plate. Add the marinade and apple cider to the pan and bring to a simmer, scraping up any flavourful browned bits stuck to the bottom of the pan.


5.  Pour a small amount of the sauce (about ¼ cup) into a small dish, whisk in the cornstarch until you get rid of all the lumps, and return the mixture to the pan. Simmer for about 5 minutes, until the sauce is slightly thickened. Return the apples to the sauce along with any juices that have collected on the plate.


6.  Slice the pork and serve it topped with the apples and sauce.


Happy Birthday Gramma!

Saturday, April 21, 2012

Recipe: Spicy Individual Meatloaves


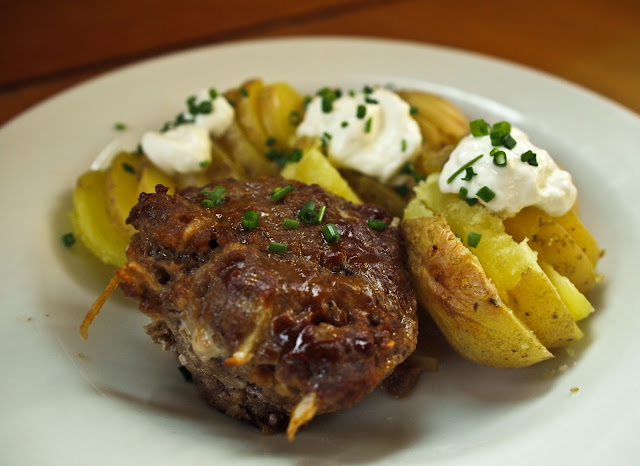
You know what's really hard to do? Take an appetizing picture of meatloaf. Don't get me wrong. I love meatloaf. And this meatloaf was freakin' amazing. But meatloaf does not photograph well. :(

Ah well. Photographs aside, I am very proud to say that I came up with this recipe myself. The idea for individual meatloaves came from my lovely aunt (thanks!), and I thought it was brilliant, especially since I am currently living alone (not counting the dog, who I'm very certain wanted to be included in the guest list for tonight's dinner). There were 2 added bonuses of making small individual meatloaves: 1) it took way less time to cook, and 2) the leftovers can be wrapped and frozen individually for future meals. Woohoo!

The actual ingredients for these bites of savory goodness were more a result of what I happened to have on hand, so the recipe will be less precise than usual. No matter. Meatloaf is one of those very flexible dishes that you can flavour or spice however you want (within reason though, of course).


Your first step is, of course, to make a big gooey mess. Combine some ground beef, Italian sausage meat, thinly sliced onion, garlic, barbecue sauce, cracker crumbs and Worcestershire sauce and mix with you hands until everything is evenly combined.


Fill a muffin tray with the meat mixture and brush the tops of each with barbecue sauce. No need to grease the tray beforehand -- the beef would probably have enough juice on its own not to stick, but the sausage makes extra sure of that. Once the tray is full, simply fire it in the oven at 350F for 20 minutes, and presto! Mini meatloaves. They pop out of the muffin pan like a charm, leaving most of the fat behind in the bottom of each cup. It makes the pan a disgusting mess to deal with, but it means you avoid that nasty layer of squishy fat that you sometimes get on the bottom of meatloaf.

Serve with potatoes or rice, or whatever else strikes your fancy. Enjoy!


Here's the full recipe, but most of the measurements are approximate, so feel free to jimmy with them to suit your preferences:

Spicy Individual Meatloaves
Ingredients:
1 pkg lean ground beef
1/2 pkg spicy Italian sausage meat
1 onion, minced
2 garlic cloves, minced
1/2 cup barbecue sauce (+ however much you brush on top of each individual "loaf")
1 1/2 Tbsp Worcestershire sauce
10-15 crackers, crushed into fine crumbs
Salt and pepper to taste

Directions;
1. Preheat the oven to 350 F.

2. In a large bowl, mix together all ingredients until evenly combined.

3. Place an even amount of the meat mixture in each cup of a muffin tray. If you fill them really full, you may want to put a baking sheet under the muffin tray when you cook them to catch any juices that run off.

4. Brush each loaf with additional barbecue sauce.

5. Cook for 20 minutes, then remove from muffin tray, leaving behind the excess fat.

Wednesday, April 18, 2012

Recipe: Creamy Tomato Fusilli with Spicy Sausage


Hello! I am back in the kitchen after what has been a bit of a necessary hiatus. I cooked my first ever turkey for Easter (more on that later), and then we basically survived off of leftovers for a week, so there wasn't any real need for me to be cooking.

Anyhoo ... today was my first time doing real cooking at the place where I'm house-sitting (as opposed to reheating food other people have cooked), and let me tell you, I don't particularly enjoy using someone else's kitchen. Well, that's not entirely true. This kitchen is beautiful and has a ton of counter space. What I dislike is not being able to find anything when I need it!! So annoying. Ah well. I am pretty well acquainted with their organizational scheme now, having rifled through every single drawer and cupboard several times over the course of cooking this one meal.

I digress. I adlibbed with this recipe a lot because, well, it's pasta and you can do that. But mostly because I forgot to buy some of the ingredients. Regardless, it was DELICIOUS. And I've never done much cooking with Italian sausage, so I found the flavor delightfully different than my usual fare. Yum, yum, yum.


First step? Brown some spicy Italian sausage meat in a skillet. No need to add oil, unless you buy super extra lean sausages. Since I find the idea of un-casing sausages and crumbling the meat myself repulsive, I just bought a tray of Italian sausage meat. Sausage casing = gross. Anyways, once the meat is just browned, add in some fresh chopped garlic and yellow bell pepper.


Then throw some diced tomatoes and chicken broth in the pan, along with whatever spices you like. Depending on the spicyness level of the sausage you use, you'll want to adjust your spices as necessary.


The finishing touch? Add in some whipping cream! I'm sure regular ol' heavy cream would work as well, but since I had leftover whipping cream from Easter, that worked out perfect. Depending on how creamy you like your pasta, you can adjust the amount of cream you add.

Pour the sauce over cooked pasta and mix together. Layer half the pasta in a baking dish, top with shredded cheese, pour on the rest of the pasta, and top with more cheese. Bake in the oven for 15-20 minutes, or until the cheese is melted.


Here's the full recipe (which, shockingly, is from The Guy Can't Cook by Cinda Chavich)


Baked Fusilli with Spicy Sausage and Creamy Tomato Sauce*
Ingredients:
1 lb (500g) spicy Italian sausages, casings removed, crumbled
4 garlic cloves, finely chopped
1 yellow bell pepper, cut into slivers
1 lb (500g) cherry tomatoes, halved (or one 796 mL can diced tomatoes)
1 cup chicken or beef broth
1/2 cup whipping cream
1 lb (500g) fusilli (or other short pasta - rigatoni, penne, etc)
1 cup freshly grated Parmesan cheese
1 cup grated mozzarella cheese
1/2 cup fresh basil leaves, slivered  (I didn't have any of these, so I didn't add them -- still delicious though)
freshly grated Parmesan cheese, for garnish

Directions:
1. Heat a large saucepan over medium-high heat and add the crumbled sausage. Saute for 5-10 minutes or until it begins to brown. Add a splash of olive oil if the sausage is very lean. Add the garlic and bell pepper to the pan and saute for 5 minutes. Stir in the cherry tomatoes and cook 1 minute longer. Add the broth and stir up any brown bits from the bottom of the pan. Bring to a boil and cook for 5 minutes or until the broth has reduced by half. Reduce heat to low and simmer. Slowly add the whipping cream and simmer until the sauce is thick enough to coat the back of a spoon.

2. Meanwhile, cook the pasta until al dente. Drain and mix with the sauce. Stir in the basil.

3. Rub a 9x13 inch baking dish with olive oil. Pour half of the pasta into the dish. Combine the two cheeses. Scatter half of the cheese mixture over the pasta, then fill the dish with the remaining pasta and top with the remaining cheese. Bake at 375 F for 20-30 minutes or until the cheese is bubbly and browned on top.

Serves 6.


*Note: the original recipe called for rigatoni, not fusilli, but fusilli is my favourite, so I switched it.

Wednesday, April 4, 2012

Recipe: Kung Pao Pork + Fried Rice


Today? Today me and the kitchen were not friends. Yet in spite of that, this meal turned out delicious.

But like I said, today was not a good cooking today. I dropped the radishes all over the floor. I put an ingredient from the fried rice into the sauce for the kung pao pork, instead of the ingredient that I made a special trip to the store for today. In the middle of making the fried rice, I discovered that we were out of eggs. We are never out of eggs. Anyways, you get the idea. Luckily both of these recipes are very forgiving.

The pork needs to marinate for about half an hour before you start cooking it, so you do need to think a little ahead of time if you want to make this. While it's stewing in the fridge, get going on chopping up some veggies. You can throw pretty much any vegetables that you feel like in the fried rice, which is partly what makes it so great!


Once the pork is done marinating, brown it in oil in a wok (or frying pan if you're too lazy to get the wok off the top shelf). Not that I would do that. Nope.


Yum, yum, yum. As soon as the pork is browned, pull it off the pan and throw in the veggies: onions, peppers, snow peas. Then pour the sauce over it and bring to a boil.


It'll start to thicken up because of the cornstarch, so you'll want to add the pork back in fairly quickly. Make sure the pork is cooked all the way through, but don't overdo it. You want it to be tender!

In the meantime, while this is all going on, you can be frying up your rice and whatever veggies you decided to add. Normally, of course, there are eggs in fried rice, but as previously mentioned, I didn't have any. Didn't matter. Still turned out great. Whip up a little mixture of sesame oil, soy sauce and chili paste and pour it over the rice. Add some chopped green onions at the last minute, and voila!


Delicious! I like to fry it until the bottom gets just a tiny bit crispy, and then flip it over and let the other side crisp up as well. Yum.

When the pork is done, pile it on top of some rice, top with unsalted peanuts or cashews, and dig in!


Here are the recipes (although admittedly, the fried recipe was only very loosely followed), both taken from The Guy Can't Cook by Cinda Chavich.

Kung Pao Pork
Ingredients:
1 lb (500g) pork tenderloin (or boneless chicken), cut in 1-inch cubes
1 Tbsp soy sauce
1/2 tsp Asian chili paste
1 tsp cornstarch

Sauce:
1 cup chicken stock
2 Tbsp Chinese black bean sauce (or, you know, hoisin sauce. Cuz that's what I did by accident.)
1 Tbsp soy sauce
1 Tbsp brown sugar
1 tsp Asian chili paste
1 Tbsp cornstarch

2 Tbsp canola oil, divided
1 small onion, slivered
2 tsp ginger, minced
2 cloves garlic, minced
1 small dried red chili pepper, crumbled
1 red or yellow bell pepper, diced into 1/2 inch cubes
1/2 cup snow peas
2 green onions, cut into 1-inch lengths
1/2 cup roasted unsalted peanuts or cashews

Directions:
1. Marinate the pork in the soy sauce, chili paste, and 1 tsp cornstarch for 30 minutes in the refrigerator.

2. Meanwhile, make the sauce. In a small bowl, combine the stock, black bean sauce, soy sauce, brown sugar, chili paste and 1 Tbsp cornstarch. Set aside.

3. Heat a wok over high heat for 30 seconds before adding 1 Tbsp of the oil. Add the pork to the hot wok and stir-fry for 2-3 minutes or until it's no longer pink. Remove the pork and set aside.

4. Add the remaining oil to the wok. Add the onion, ginger, garlic, dried chili pepper, bell pepper, and snow peas. Stir-fry for 1 minute. Add the reserved sauce and bring to a boil.

5. Return the pork to the wok. Bring to a boil and heat through. Stir in the peanuts and serve immediately over rice or noodles.

Serves 4.


Special Fried Rice
Ingredients:
Any vegetables you feel like (I used carrots, peppers, and radishes)
3 Tbsp canola oil
1 Tbsp minced garlic
3-4 cups leftover cooked rice, cold
2 eggs, lightly beaten with 1 tsp sesame oil
2 Tbsp light soy sauce
1 Tbsp oyster sauce or hoisin sauce
2 green onions, chopped
Optional: 1/2 lb cooked chicken, roast pork, or turkey, chopped into small cubes

Directions;
1. Wash and chop whichever vegetables you're choosing to use.

2. Place a wok over high heat for 30 seconds, then drizzle with the oil. Immediately add the garlic and stir-fry for 1 minute. Turn the heat down slightly and add the rice, spreading it evenly over the surface of the pan. Stir-fry the rice for 1-2 minutes, and then add the veggies. Cook for 3 to 5 minutes longer, stirring, until the vegetables begin to soften. If you're adding meat to your rice, than do so.

3. Push the rice mixture to one side of the pan and add the beaten eggs, stirring to lightly scramble before mixing into the rice. In a small bowl, whisk together the soy and oyster sauce and drizzle over the stir-fried rice. Toss to combine. Add the green onions and serve immediately.

Serve 4.


And just because kung pao is super fun to say, and I'm a nerd, I'll leave you with this image. I'll leave it to you to figure out why. :)

Monday, April 2, 2012

Recipe: Bistro Ham and Cheese


Yum. For those of you who know me well, you know I am all about eating breakfast for dinner. It's pretty much my favourite thing. And this recipe? It's like French toast meets grilled cheese, which basically makes it the best breakfast-for-dinner sandwich EVER. Also, it takes all of 15 minutes to make. Bonus!

A key factor in this recipe is obviously the bread. I bought me some 3 cheese bread from Thrifty's, and it was perfect. Yum. Don't slice it too thick though if you want the sandwiches to heat evenly all the way through.


Slather one piece of bread with your preferred type of mustard - dijon, honey, regular ol' French's. Then layer Swiss cheese, smoked ham, and some more cheese. The original recipe called for slathering the top slice with mayonnaise, but I substituted some Chipotle Lemonaise instead. Yum.

Then dip the sandwich in the egg mixture, just like you would French toast. Shake off the extra liquid - you don't want it to be soggy! Then throw it in the frying pan.


Cook on medium heat for about 5 minutes on each side, or until golden brown and your preferred level of crispiness. Cut, and serve!


Here's the full recipe:

Bistro Ham and Cheese
Recipe from "The Guy Can't Cook" by Cinda Chavich


Ingredients:
8 slices French bread
2 Tbsp Dijon mustard
8 slices Swiss cheese
12 thin slices lean, smoked ham
3 Tbsp mayonnaise
3 eggs, beaten
1/4 cup milk, or cream
1/4 tsp salt
2 Tbsp butter
2 Tbsp olive oil

Directions:
1. Spread four slices of bread with mustard and place on counter. Top each with a slice of cheese, three slices of ham, and another slice of cheese. Slather each of the remaining four slices of bread with mayonnaise and set on top, pressing down slightly, to make four sandwiches.

2. In a bowl, whisk together the egg, milk and salt. Pour into a wide, shallow dish, large enough to hold a sandwich.

3. In a large, non-stick skillet, heat half of the butter and oil together over medium heat. When the pan is hot, dip each side of the sandwich into the egg mixture. Shake off any excess and place in the hot pan. Fry until browned on both sides, about 5 minutes per side. Repeat with the remaining sandwiches, then slice them on the diagonal to serve.

Serves 4 - and believe me, these sandwiches are plenty filling. 

Wednesday, March 28, 2012

Recipe: Sweet & Tangy Orange Chicken


Yum. Yum, yum, yum. This recipe was absolutely delicious! It's largely based on a recipe I found here, but I did tweak it a little bit. It was my first time trying a recipe from that particular blog, and it was well worth the effort. The main reason I picked this recipe was totally in no way related to the fact that it sounds exactly like a meal Katniss eats in The Hunger Games. Nope. Not at all.

Anyways, on to the sweet, tangy goodness that is this wonderful, wonderful recipe. I forgot to take a picture of the ingredients, so we'll just launch right in. Take a couple of chicken breasts and slice them up into fairly even chunks.


Toss them in a bag with some flour, salt and pepper until they're nicely coated. Brown them on all sides in some melted butter in the frying pan.


While they're browning, mix together some brown sugar, white wine vinegar (or just regular vinegar if you don't have any), orange juice, nutmeg and dried basil. I was a little alarmed by the amount of nutmeg in this recipe (I am not nutmeg's biggest fan), but never fear! It turned out delicious, even if the nutmeg smell while cooking was a tad strong.


Once the chicken is browned, pour the sauce over the chicken in the pan. Simmer for 20 minutes. Add in some canned mandarin orange slices 5 minutes before you intend to serve for a sophisticated touch.


Serve over rice with a side of asparagus (or any other delectable vegetable you prefer), and you've got yourself a really amazing looking (and, more importantly, amazing tasting) meal that's done in 45 minutes flat. 


Absolutely delicious! 

Here's the full recipe:

Sweet & Tangy Orange Chicken

Ingredients:
2 boneless skinless chicken breasts, cut into even chunks*
1/2 cup flour
1/2 tsp salt
1/2 tsp pepper
Melted butter or olive oil

Sauce:
3 Tbsp brown sugar
3 Tbsp white wine vinegar (or regular white vinegar)
1.5 cups orange juice (with or without pulp, whichever you prefer)
1 tsp nutmeg
1 tsp dried basil
The juice from 2 small cans of mandarin orange slices
Optional: add some ground ginger

Directions:
1. Combine the flour, salt and pepper in a bag. Toss in the chicken chunks and shake until well coated. In a skillet, either melt the butter or heat the oil. Then add the floury chicken, browning on both sides. Because of the flour coating, they should brown up nice and crisp, should you desire it. Once the chicken is browned, drain off any excess fat. (I didn't find that necessary -- the flour tended to absorb any extra fat)

2. Combine the sauce ingredients, taking care to set aside the mandarin slices once you have added the juice to the sauce. Pour the sauce over the chicken. Cover and simmer for approximately 20 minutes. (If you want a thicker sauce - which I recommend - then leave the cover off to reduce the sauce, allowing it to naturally thicken as it cooks). 

3. Approximately 5 minutes before you are ready to serve, add in as many of the mandarin orange slices as you wish. I say the more the merrier! :)

4. Serve over a bed of rice, and devour eagerly.


Delectable right down to the last bite!

* I was a little worried about how many people this recipe would serve, but it easily made enough for 5. Depending on how generous you want to be with your portions, it could even be suitable for 6. Pretty good for 2 chicken breasts!